
Make your first API call in Jamf's Platform API Gateway (Beta).
Overview
The Platform API Gateway (Beta) is your single entry point for building integrations across all Jamf's APIs. Instead of juggling multiple endpoints and authentication systems, you get one consistent, OAuth 2.0-authenticated API surface — scoped to your tenant, governed by fine-grained permissions, and ready to plug into your existing tooling. This article walks you through everything you need to go from zero to your first authenticated request.
Prerequisites
Before you begin, make sure you have:
- Access to Jamf Account and Jamf Pro, Jamf School or Jamf Elevate
- The Feedback Program privilege in Jamf Account.
Jamf Account
All integration setup, including enrollment into the beta, happens in Jamf Account. If you don't have an account yet, register using the email address Jamf has on file for your organization, or ask your organization administrator to add you.
How to get started
- Sign in to Jamf Account at account.jamf.com.
- Go to Feedback Program in the left navigation and enroll in the Platform API Gateway Beta under Other.
- If you don't have the Administrator role, create a custom role with Integrations privileges, assign it to your user, then log out and back in for the changes to take effect.
- Navigate to Integrations to create your first integration.

Create integration panel in Jamf Account with all available options.
Create your first integration
An integration gives you access to the Platform API Gateway. It defines which tenants you can interact with, what permissions you have, and holds the client ID and secret you'll use to authenticate.
The client_id and client_secret are used to authenticate to the Platform API Gateway using the OAuth 2.0 Client Credentials grant type.
Follow the instructions below to create your first integration:
- Sign in to Jamf Account, select Integrations from the left navigation and click Create integration.
- Enter a Name and Description, then select the Region where your product instance(s) are located.
- Under Tenants, select the Jamf instance(s) you want this integration to access.
- Under Select permissions, choose the permissions to grant. Permissions are scoped per product (for example,
read:pro:blueprints). - Click Create integration.
After creation, the Integration details panel displays your client ID (client_id) and client secret (client_secret), along with a ready-to-use curl command.
Safely store your client secret immediately. It will not be shown again after you close this panel.
Tenant and tenant ID
Each Jamf product instance has a unique tenant ID. When creating an integration, you select which tenants it has access to. The permissions available to an integration depend on the type of tenant scoped — for example, integrations scoped to a Jamf Pro tenant can be granted Jamf Pro-specific permissions.
After the integration is created, the Integration details panel lists the scoped tenants — click any tenant pill to copy its tenant ID to your clipboard.
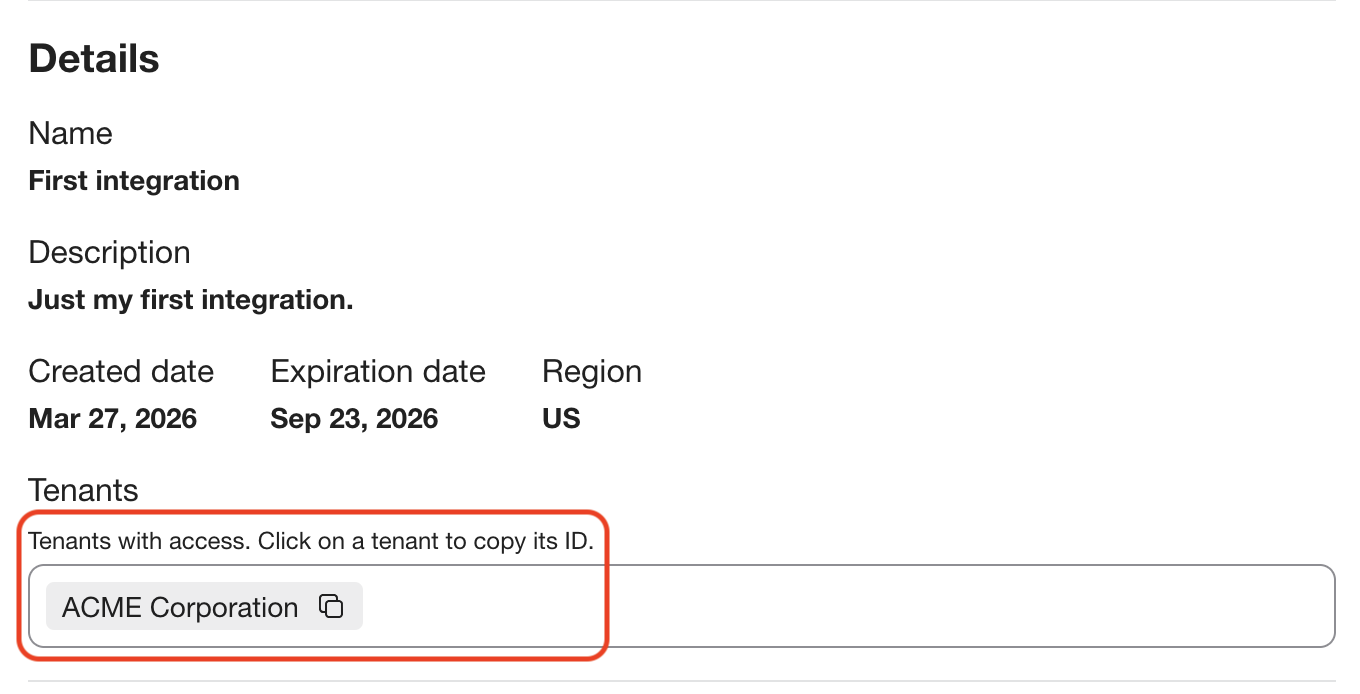
Copy the tenant ID by clicking on the tenant pill in the Integration details panel.
Every API request includes the tenant ID in the URL path. For example:
https://us.apigw.jamf.com/api/blueprints/v1/tenant/e77c1408-10c8-4007-b177-abc9157fbcaa/blueprints
Request an access token
Before you can call the API, you need an access token — a short-lived key issued in exchange for your client_id and client_secret, which you then pass in the Authorization header of every API request.
Use any HTTP client to request a token from the token endpoint. The Integration details panel includes a sample curl command:
curl --request POST \
  --url https://us.apigw.jamf.com/auth/token \
  --header 'Content-Type: application/x-www-form-urlencoded' \
  --data-urlencode 'grant_type=client_credentials' \
  --data-urlencode 'client_id=<your_client_ID>' \
  --data-urlencode 'client_secret=<your_client_secret>'
The server responds with the following:
{
  "access_token": "eyJhbGciOiJSUzI1NiIsInR5cCI6IkpXVCJ9...",
  "expires_in": 900,
  "refresh_expires_in": 0,
  "token_type": "Bearer",
  "not-before-policy": 0,
  "scope": "read:pro:blueprints"
}Tokens expire after 900 seconds. You can track the
expires_invalue in your code to proactively request a new one before it hits zero.
Make your first API call
Pass the access_token as a Bearer token in the Authorization header — meaning any request that bears this token is granted access. Below is a sample request to the Blueprints API:
curl --request GET \
  --url 'https://us.apigw.jamf.com/api/blueprints/v1/tenant/e77c1408-10c8-4007-b177-abc9157fbcaa/blueprints' \
  --header 'Accept: application/json' \
  --header 'Authorization: Bearer <your_access_token>'
A 200 OK response confirms everything is wired up correctly.